MSSQL Customer Setup
This requires the BarTrack Software to be installed on the POS server. Some anti-virus and/or firewalls may need to be set up to allow the service to run in the background. Please allow a BarTrack support engineer access to the server for initial assessment or have your IT department reach out to us if you prefer to oversee the setup.
Download our remote access software to get started.
Click Here to Download
Installation
Setup requirements
- Microsoft SQL Server Management Studio (often already installed)
- Administrator access to the database server.
Setup Instructions
-
-
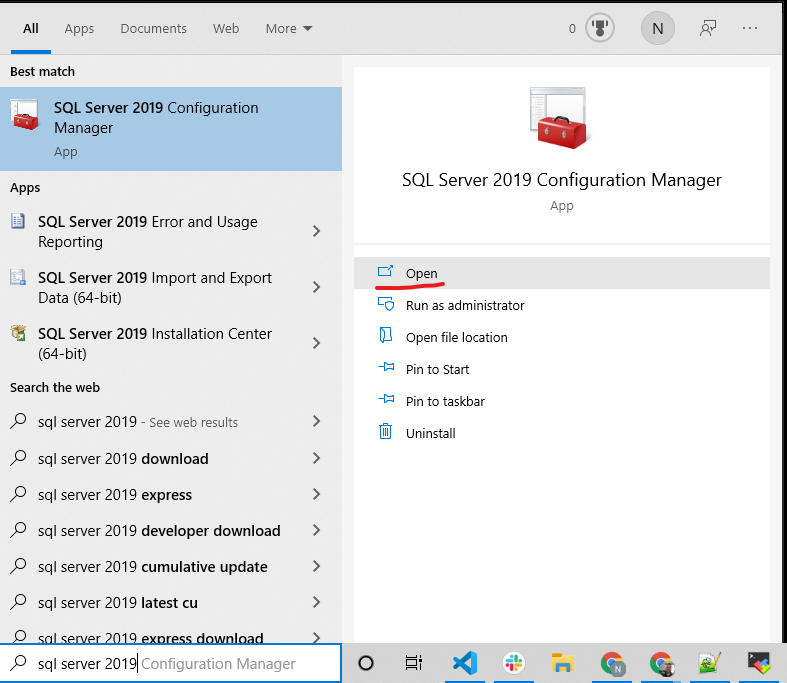
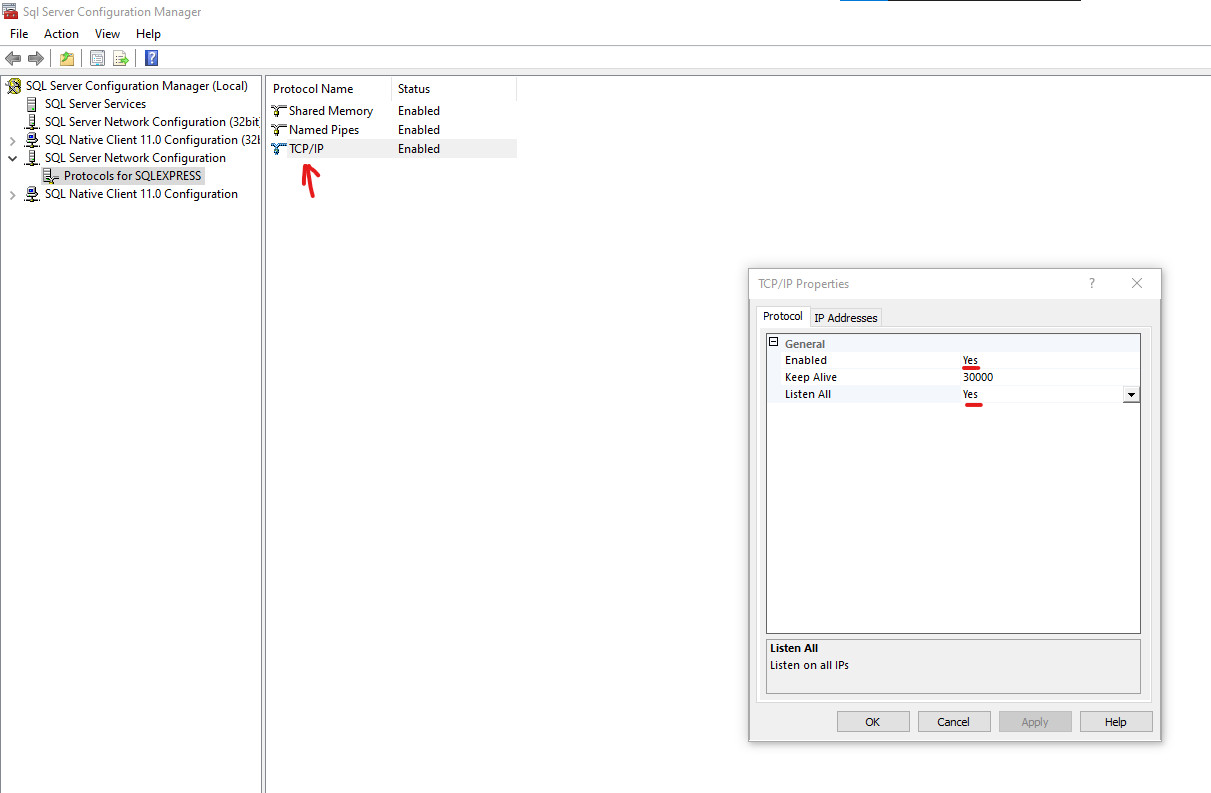
Open Microsoft Server Configuration Manager

- Enable Named Pipes and TCP/IP
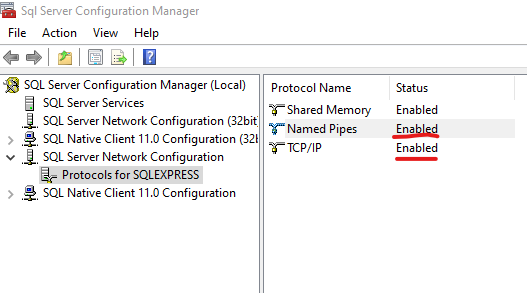
- Double-click TCP/IP. Under the Protocol tab, make sure that Enabled = Yes and Listen All = Yes

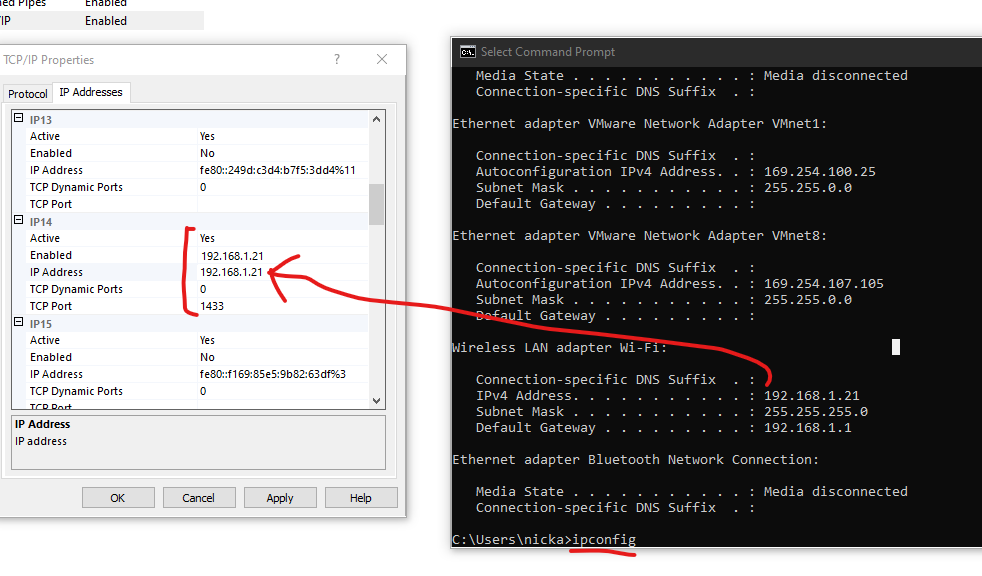
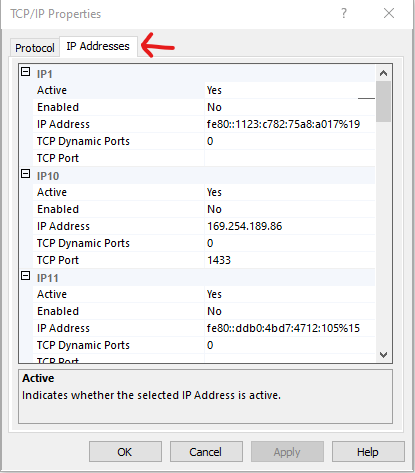
- Click the IP Addresses tab, and then…
- Find the IP entry that matches your IP address, or change the one closest to fit yours.
-
To find your IP address, open a command prompt by clicking the start menu and typing “cmd”. See the two screenshots below.
-
Active = Yes
-
Enabled = Yes
-
TCP Port = 1433 (usually the default port)
-
Click “Apply” and then “OK” a couple of times until you’re back to the SQL Manager screen, which you can then close.

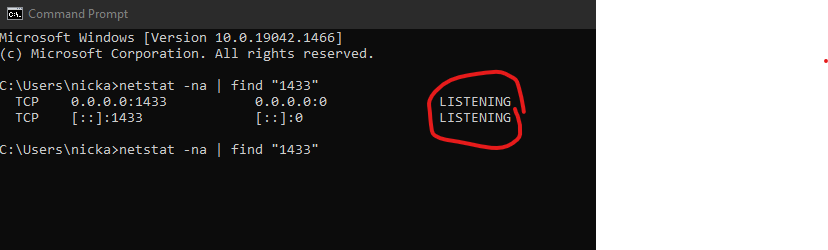
- Check to make sure the service is LISTENING.
- In your command prompt type:
netstat -na | find “1433”
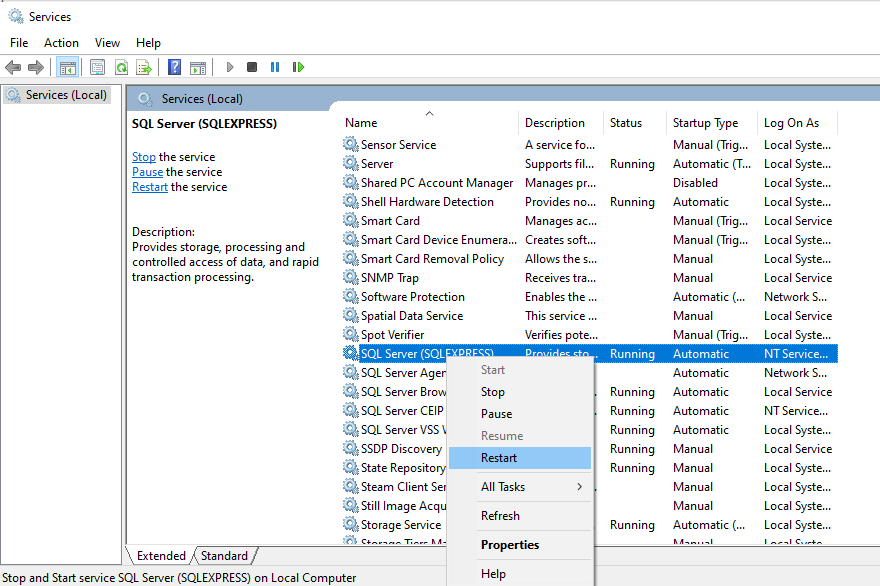
- If it is not listening, make sure the service is started.
Click Start, click run, typeservicesand start/restart the SQL Server (SQLEXPRESS) service.
- In your command prompt type:
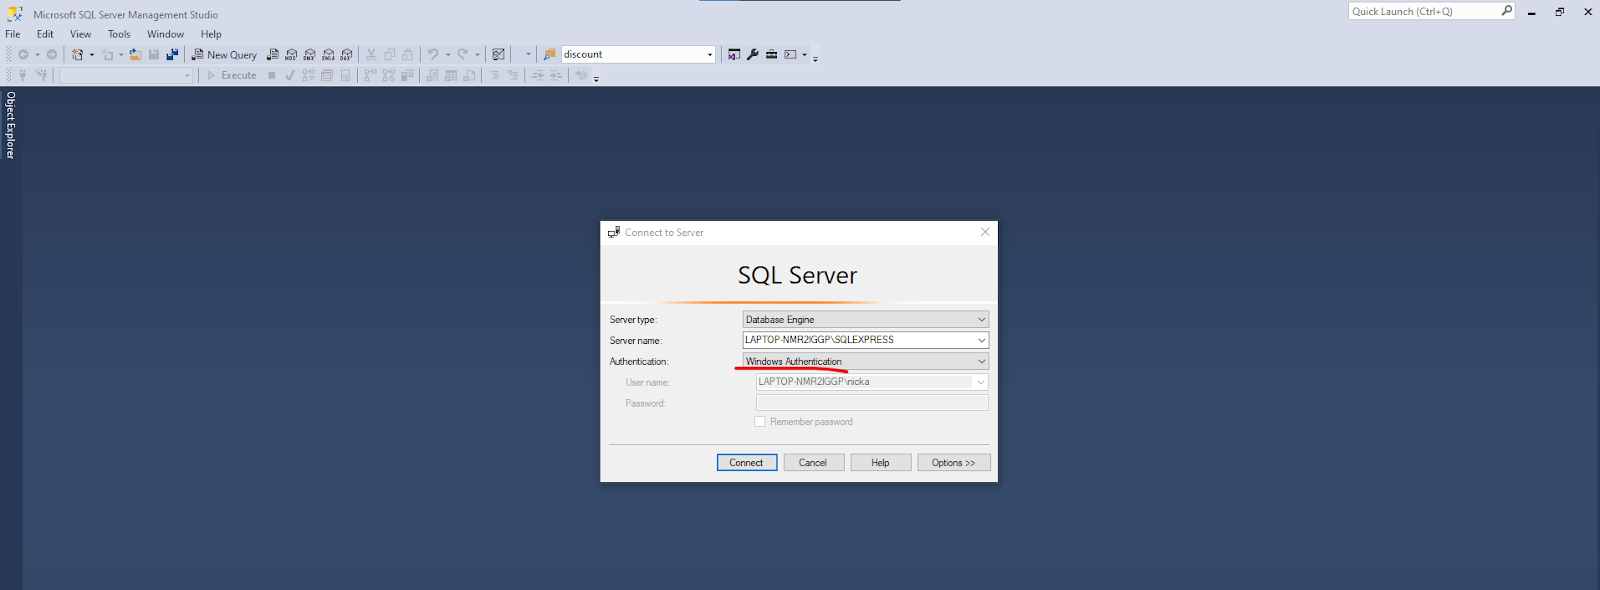
- Open SMMS

- Connect with Windows Authentication (no password needed).
- You must be logged into Windows as the administrator user that created the DB.
- You must be logged into Windows as the administrator user that created the DB.
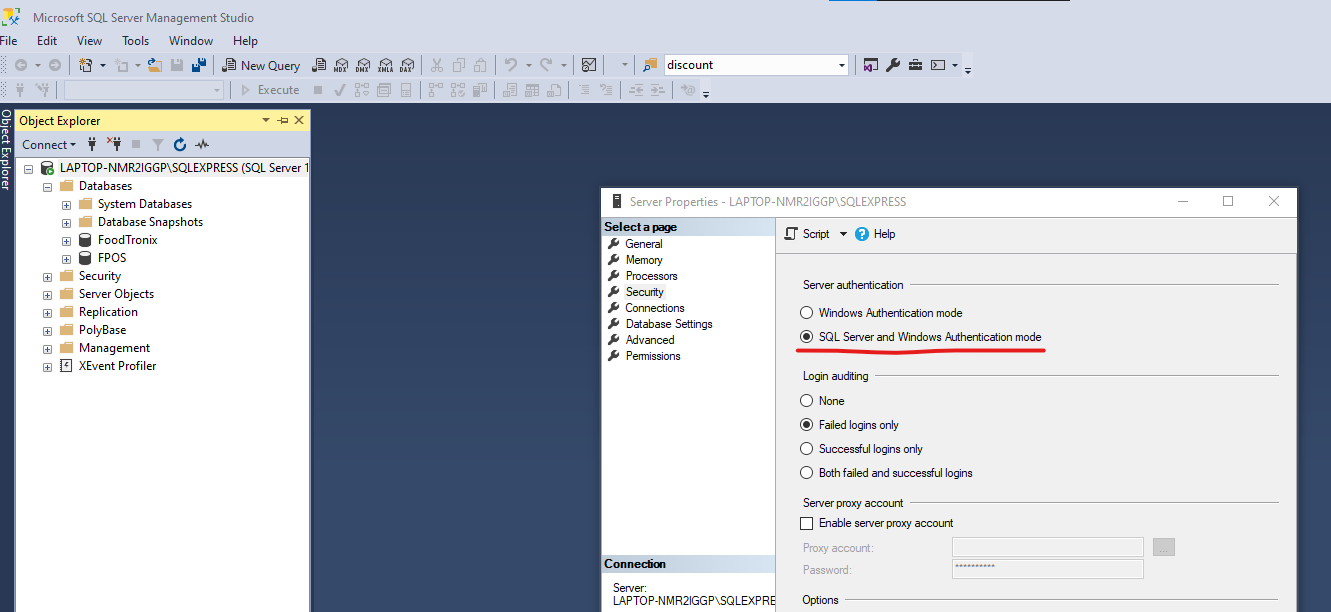
- Right click on the Database object, select Properties.
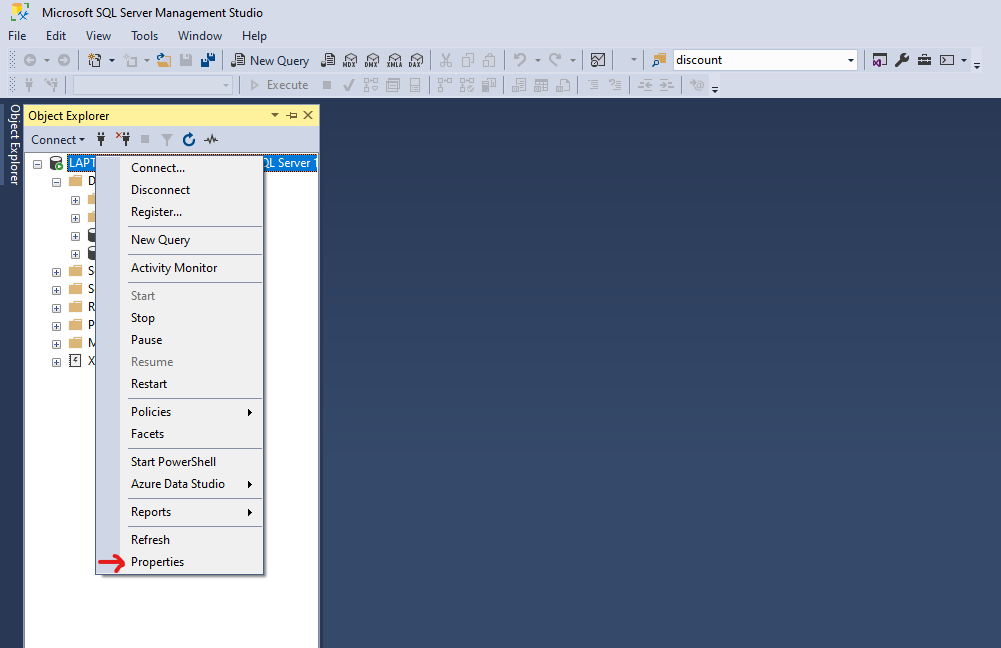
- Click the security page, and make sure Server Authentication is set to “SQL Server and Windows Authentication mode”. Press OK.
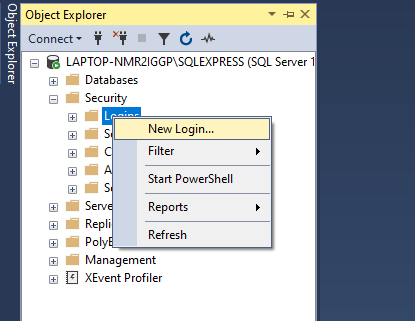
- Right click on Logins and create a new user.

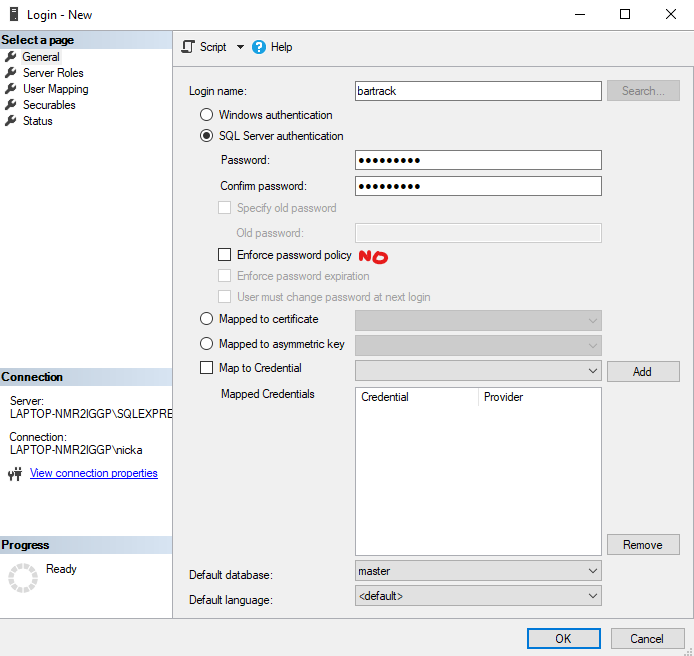
- Create the user with the following details, DON’T CLICK OK YET.

DO NOT ENFORCE PASSWORD POLICY.
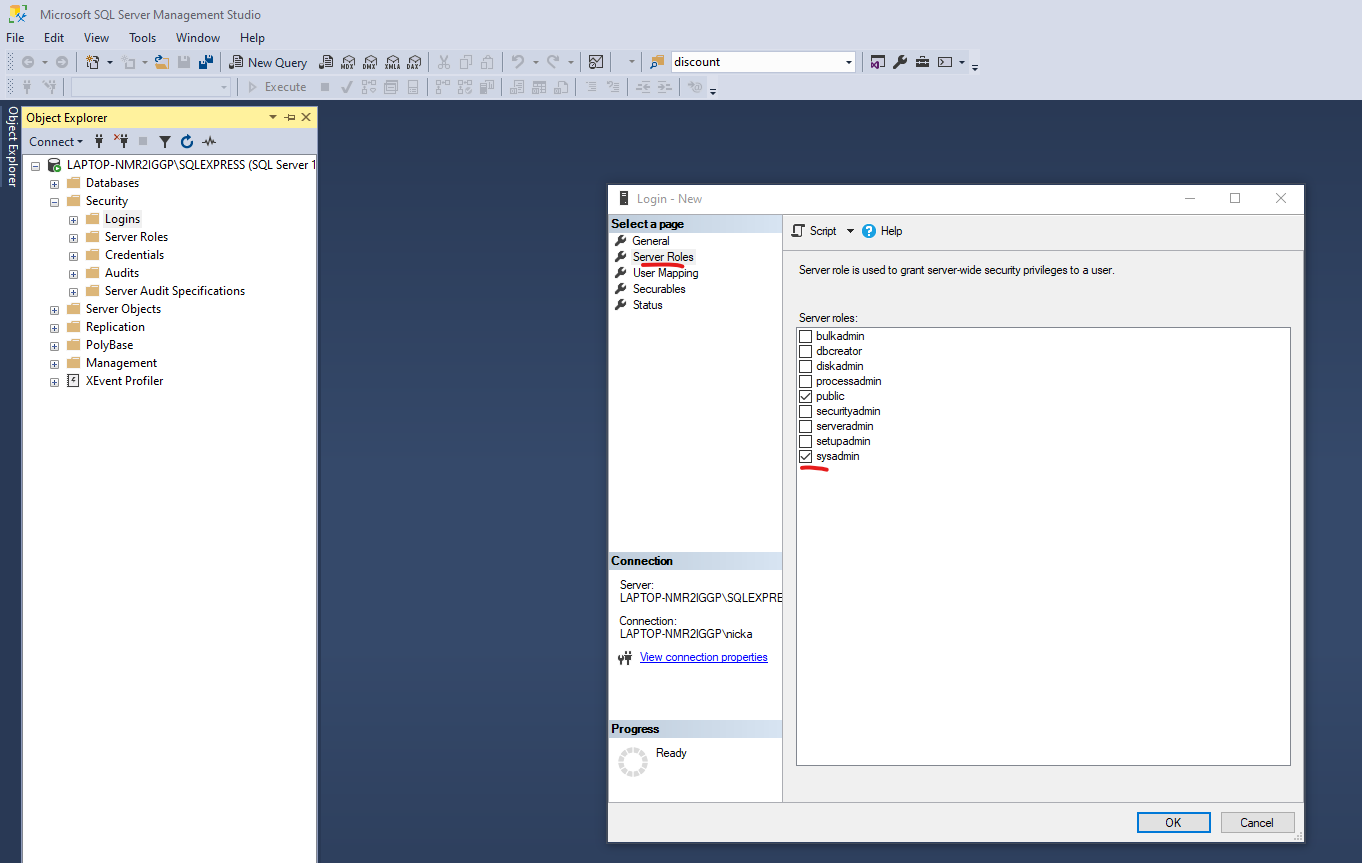
- Select the Server Roles page.
- Select sysadmin or a read-only role. Don’t click OK yet.

- Select sysadmin or a read-only role. Don’t click OK yet.
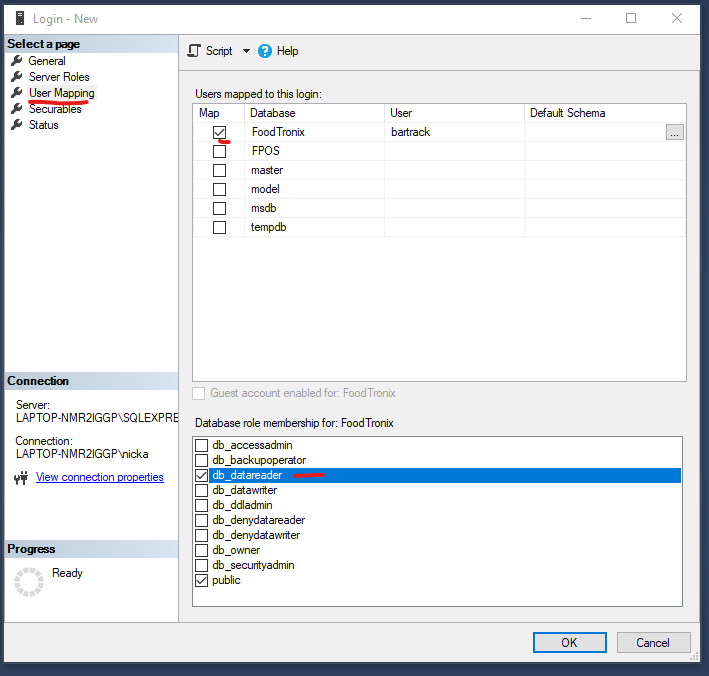
- Select User Mapping page.
- Select the Foodtronix database.
- Select the dd_datareader role.
- Click OK.

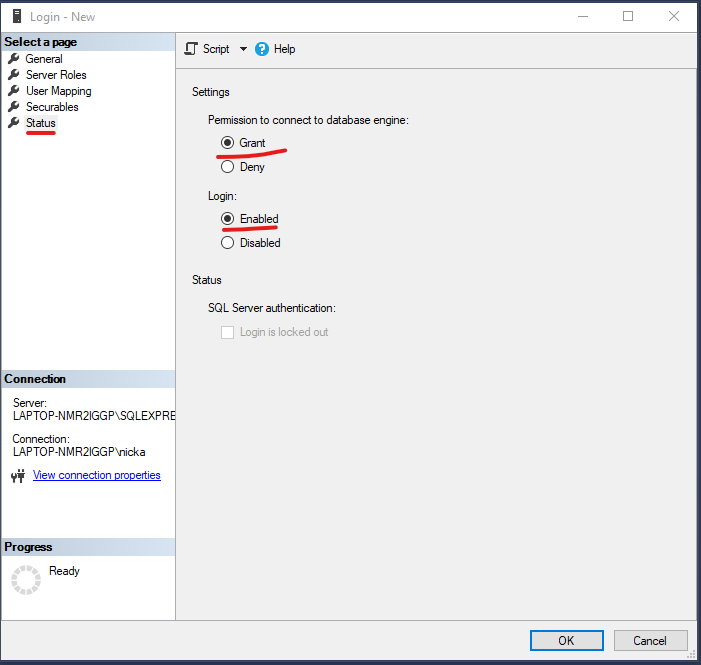
- Enable the user
- Grant - Permission to connect to DB engine.
- Grant - Permission to login.

- Test the user is able to login, and you can select from a table to read it’s contents.
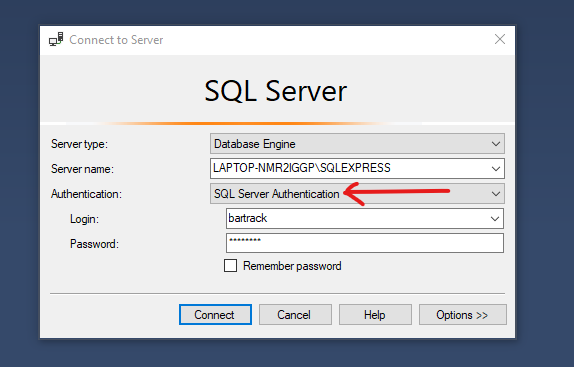
- Disconnect from the current server under File -> Disconnect object explorer.
- Attempt to reconnect and log in again, but this time select SQL Authentication.


-


Setup Summary
- This integration reads data from the local MSSQL database. BarTrack needs access to the MSSQL database with read permission, mapped to the Foodtronix database. This must be done with the admin user who created the Foodtronix database originally. Usually this would be a Windows administrator user.
- Alternatively, you may have your IT person create a BarTrack user & password in the MSSQL database with read only access to the Foodtronix db,mapped to the Foodtronix database. SQL and Windows authorization mode must be enabled in the database security properties. Follow the MSSQL Integration for further instruction.