# Toast
# Toast BarTrack Setup
## Cloud Integration
1. Visit the [Toast Homepage](https://pos.toasttab.com) in a web browser
[](https://wiki.bartrack.beer/uploads/images/gallery/2022-04/image-1649257940036.png)
2. Input the BarTrack `technology@bartrack.beer` credentials
[](https://wiki.bartrack.beer/uploads/images/gallery/2022-04/image-1649257963274.png)
3. Locate `Switch Restaurant` on the top left side of the webpage and then click it and find the newly activated establishment - you can either manually search the list or enter the establishment name into the filter
[](https://wiki.bartrack.beer/uploads/images/gallery/2022-04/image-1649257985234.png)
4. **Once the newly activated establishment has been found, make note of the establishment name and copy it exactly as displayed in the Toast dashboard. It is extremely important that this is accurately captured. In the example below, we would want to capture `Fire Works - Courthouse - 2350 Clarendon Blvd`** [](https://wiki.bartrack.beer/uploads/images/gallery/2022-04/image-1649258025673.png)
5. The next step is updating the **establishments** table of the database to reflect the necessary information for the integration. The primary things that you’ll need to know are as follows:
- Establishment ID
- Does the customer utilize modifiers?
- Establishment Timezone
- Date Activated
- Establishment Name from Toast Dashboard
Once you have collected all of the necessary information you can proceed with executing the SQL query below, this will prompt you to enter several variables which encompass the information you captured above.
**SQL Query:**
```SQL
UPDATE
establishments
SET
integration_id = 4,
day_week_begins = 2,
default_pour_cost_pct = 20,
pos_hour_integration_done = 5,
pos_modifiers = ${pos_modifier_flag}$,
rpts_daily_deliver = true,
rpts_daily_hour = 9,
rpts_weekly_deliver = true,
rpts_weekly_hour = 9,
rpts_monthly_deliver = true,
rpts_monthly_hour = 9,
rpts_combine_comps_voids = false,
rpts_rotation = '03:00:00',
time_zone = ${timezone}$,
rpts_valid_from = ${date_activated}$,
pos_cloud_based = true,
pos_properties = '{"header_titles": {"category": "${category}$", "subcategory": "${subcategory}$"}, "location_pos_name": "${establishment_toast_name}$"}'
WHERE
id = ${establishment_id}$;
```
**Example Data for Variables:** ```
Name Value
------------------------ --------------
pos_modifier_flag true
timezone 'US/Eastern'
date_activated '2021-08-01'
category Menu
subcategory Sales Category
establishment_toast_name Test Name
establishment_id 1
```
6. After the establishment has been configured in the database, you can proceed to SSH to the POS server to complete the final portion of the configuration. Once you have accessed the server, navigate to the `~/bartrack-pos/integrations/cli` directory
[](https://wiki.bartrack.beer/uploads/images/gallery/2022-04/image-1649258550998.png)
7. Once you are in the `~/bartrack-pos/integrations/cli` directory, edit the `settings.json` file and locate the section that contains the **Toast** integrations
[](https://wiki.bartrack.beer/uploads/images/gallery/2022-04/image-1649258567280.png)
Once you have found the section, you will need to insert a record in the chronological position based on the establishment ID. Modify the record below to reflect the correct establishment ID and then insert it into the configuration file. Once the changes have been finalized, save your changes.
```JSON
"174": {
"username": "technology@bartrack.beer",
"password": "gonkig-Ceqnen-8dagta"
}
```
Once you have inserted the record into the configuration file, it should look similar to the example below:
[](https://wiki.bartrack.beer/uploads/images/gallery/2022-04/image-1649258642318.png)
8. Now that the establishment has been correctly configured you are able to pull the POS data for the customer, you will need to pull the data from the **Activation Date** onwards
# Toast Customer Setup
## Cloud Integration
[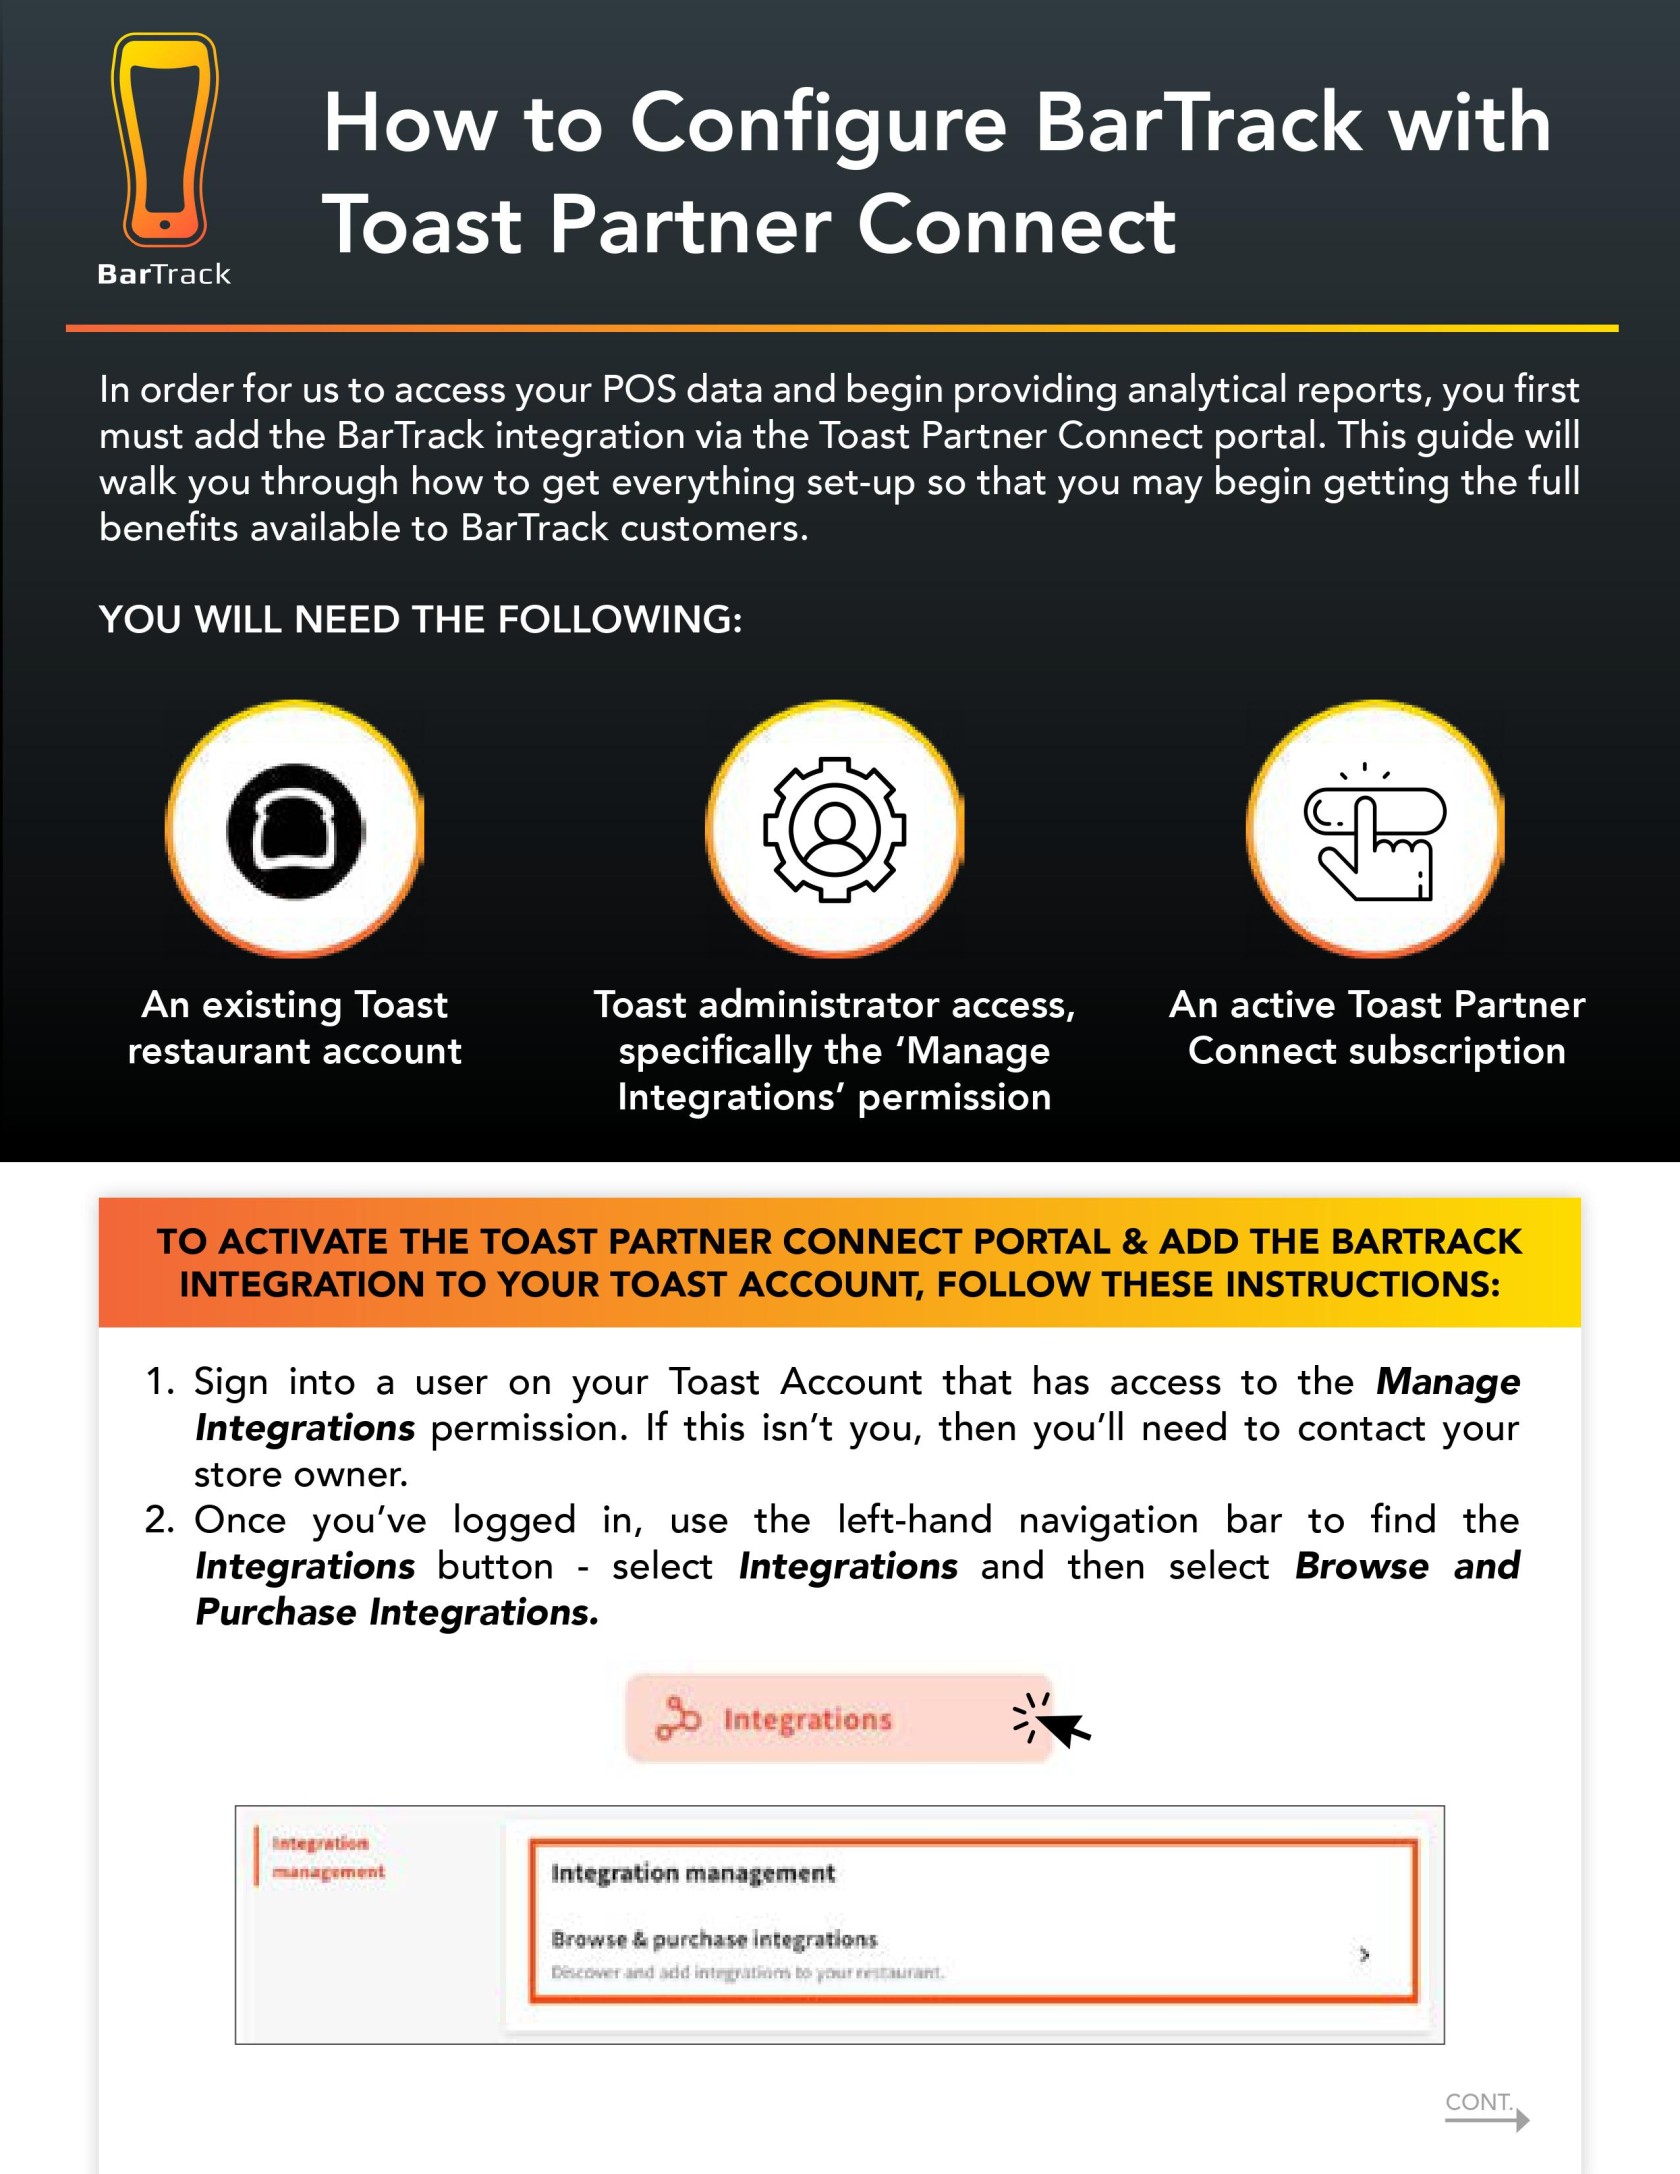](https://wiki.bartrack.beer/uploads/images/gallery/2022-12/0001.jpg)
[](https://wiki.bartrack.beer/uploads/images/gallery/2022-12/0002.jpg)